Ever tried to build a perfectly smooth, symmetrical dome in Minecraft, only to find yourself struggling with awkward curves and mismatched dimensions? You're not alone. Crafting impressive circular structures in a block-based world is a unique challenge that often leads to frustration and wasted resources. This is precisely where Minecraft Dome Generator Tools & Software step in, transforming daunting architectural visions into achievable projects. These ingenious online utilities are revolutionizing how players approach grand builds, turning complex calculations into simple clicks.
Forget hours spent counting blocks, eyeballing curves, or restarting a half-finished sphere because it just doesn't look right. Modern dome generators provide pixel-perfect blueprints, ensuring your next build is not just good, but flawless.
At a Glance: Why You Need a Dome Generator
- Pixel-Perfect Precision: Generates exact block coordinates for perfectly symmetrical domes and spheres.
- Save Time & Frustration: Eliminates manual counting and recalculating curves.
- Layer-by-Layer Blueprints: Provides clear, bottom-up instructions for placement.
- Visual Planning: Lets you preview your build in 3D before placing a single block.
- Customizable: Adjust diameter, choose solid or hollow styles, and select block textures.
- Completely Free: The best tools offer all these powerful features without cost.
The Problem: When Squares Meet Circles
Minecraft, at its heart, is a game of blocks. While this simplicity allows for incredible creativity, it poses a fundamental challenge when attempting organic shapes like spheres and domes. Achieving a truly circular profile using square blocks requires meticulous planning, precise measurements, and often, a lot of trial and error. The human eye is surprisingly good at spotting even minor imperfections in symmetry, making manual dome construction a perfectionist's nightmare.
This difficulty often leads players to either abandon their ambitious dome projects or settle for less-than-ideal approximations. Before the advent of specialized Minecraft Dome Generator Tools & Software, master builders would often resort to complex mathematical formulas, graph paper, or painstaking in-game experimentation. Each method was time-consuming and prone to error, especially for larger structures.
The Solution: Digital Architects for Your World
Enter the modern Minecraft sphere and dome generator. These browser-based applications act as your personal architectural assistant, doing all the complex math and visualization for you. They translate your desired dimensions into a practical, layer-by-layer building plan that you can follow directly in your game. Think of it like having a blueprint from a seasoned architect, meticulously detailing every block you need to place, from the ground up.
These tools don't just provide a pretty picture; they offer actionable data: exact block coordinates, a visual representation of each layer, and even the ability to choose your preferred block materials for a realistic preview. This foresight saves countless hours, stacks of precious materials, and a significant amount of headaches, making grand designs like a massive glass observatory or an imposing nether dome entirely approachable for any builder. If you're looking to generate Minecraft domes with ease and precision, these tools are indispensable.
How a Minecraft Dome Generator Works Its Magic
At its core, a Minecraft dome generator performs a series of precise calculations based on your input to create a 3D model that perfectly fits within Minecraft's cubic grid. Here's a simplified look at the process:
- Mathematical Modeling: The software uses geometric algorithms to calculate the positions of all blocks required to form a perfect sphere or dome of your specified diameter. It takes into account the "pixel-perfect" nature of Minecraft, ensuring each block contributes to a smooth curve.
- Layer-by-Layer Decomposition: Instead of giving you a complex 3D model, the generator breaks down the sphere/dome into individual horizontal layers. This is crucial for in-game building, as you typically construct from the bottom up.
- Visualization & Blueprint Generation: The calculated layers are then rendered visually, allowing you to see exactly what each stage of your build will look like. Simultaneously, the tool generates detailed instructions – either as coordinates, a textual blueprint, or an image snapshot – that you can refer to while building.
This systematic approach demystifies the creation of complex circular structures, making them accessible to builders of all skill levels.
Your Step-by-Step Guide to Using a Dome Generator
While specific interfaces might vary slightly, the general workflow for Minecraft Dome Generator Tools & Software is remarkably consistent and user-friendly. Here’s how you’ll typically navigate one:
1. Define Your Diameter
This is the most critical first step. Most generators will provide a slider or an input field where you can set the desired diameter of your sphere or dome.
- Tip: Start with a smaller diameter for your first attempt (e.g., 10-20 blocks) to get a feel for the process. Remember, the diameter you enter will be the widest point of your sphere.
2. Choose Your Style: Solid or Hollow?
Think about the function of your dome.
- Solid: Ideal for decorative spheres, giant planets, or solid architectural features.
- Hollow: Perfect for creating habitable spaces like observatories, bases, or unique structures that players can enter. This also saves significant resources.
3. Select Block Textures for Preview
Many advanced generators allow you to choose different Minecraft block textures (e.g., glass, stone, quartz, concrete, sea lanterns) for the preview. This isn't just cosmetic; it helps you visualize the finished product and decide on your in-game materials.
- Benefit: A clear preview can prevent costly mistakes in material choice later on.
4. Explore Layers from Bottom Up
Once your parameters are set, the generator will display a 3D preview. Look for a "Show Layers" slider. This feature is your best friend.
- Function: Dragging the slider allows you to virtually "build" your sphere or dome layer by layer, starting from the very bottom. This is exactly how you'll construct it in-game, so it's a direct representation of your building process.
5. Obtain Your Building Plans
The generator isn't just for visualization; it’s for providing actionable plans. You'll typically find options like:
- "Copy All 3D Coords": This will provide a list of X, Y, Z coordinates for every single block. While useful for automation with tools like WorldEdit, it can be overwhelming for manual building.
- "Download Snapshot" / "Download Blueprint": This option usually provides an image file or a text document with a visual representation of each layer, often with block counts or simple diagrams. This is generally the most user-friendly format for manual construction.
You've now successfully used the software to generate a Minecraft dome blueprint! The next step is to bring it to life in your game.
Bringing Your Digital Blueprint to Life: In-Game Construction Tips
Having a perfect blueprint is half the battle; the other half is accurately translating it into your Minecraft world. Here's a practical guide to executing your dome generator's plans:
1. Start from the Ground Up, Always
The generator provides layer-by-layer instructions from the bottommost block. Stick to this. Establish your lowest layer first, and then build upwards. This ensures structural integrity and keeps you oriented.
2. Establish a Center Reference Block
Before placing any of the outer blocks, identify the exact center of your dome's first layer. Place a temporary reference block there. This single block will be your anchor point for counting and ensuring symmetry, especially for larger diameters.
3. Count Carefully from the Center Outward
Each layer will specify how many blocks extend from the center in each cardinal direction (and often diagonally). Count meticulously. Using a temporary building block or even a different colored block for every 5 or 10 blocks can help maintain accuracy over long distances.
4. Utilize Scaffolding for Vertical Access
As your dome grows upwards, you'll need a way to reach higher layers. Scaffolding blocks are ideal for this as they are easy to place and remove. Alternatively, build temporary pillars of dirt or cobblestone that can be easily mined away once a section is complete.
5. Double-Check Each Layer
Before moving to the next layer, take a moment to look at the layer you just completed from different angles. Compare it to your blueprint. It's much easier to fix a mistake on the current layer than to discover it several layers later.
6. Material Selection: Plan Ahead
While the generator helps you visualize, consider your in-game materials carefully.
- For see-through domes: Glass (or tinted glass), especially for observatories or biodomes.
- For a clean, modern look: Smooth Stone, Quartz, or Iron Blocks.
- For colorful designs: Concrete (available in 16 vibrant colors).
- For lit spheres: Sea Lanterns or Glowstone (for internal illumination).
- For naturalistic builds: Leaves, wood, or various stone blocks.
Choosing materials beforehand will prevent having to tear down and rebuild.
Understanding the Precision: The Math Behind the Blocks
The accuracy of Minecraft Dome Generator Tools & Software isn't magic; it's rooted in precise geometry and careful programming. One key aspect is the "standard center-offset calculation method."
- Center-Offset Calculation: This method ensures that the placement of blocks is perfectly balanced around a central point. For even diameters (e.g., D=24), this calculation ensures a characteristic 2-block deep edge. This isn't a flaw but a mathematical necessity to create the smoothest possible curve given the cubic nature of Minecraft blocks. It means that the outermost blocks on an even-diameter sphere will always have a consistent thickness, contributing to visual accuracy.
- Visual Patterns for Accuracy: For larger diameters, especially D=24 and up, the outermost layers often display specific visual patterns. These patterns are clues from the generator that help you maintain accuracy. Learning to recognize these patterns on your blueprint can further enhance your in-game precision.
This underlying mathematical rigor is what makes these generators so reliable and trustworthy, helping you build a truly symmetrical Minecraft dome every time.
Beyond Blueprints: Generators and In-Game Tools
While dome generators provide the foundational blueprints, they can also complement more advanced in-game construction tools.
- WorldEdit Integration: For builders on servers or in single-player worlds with access to powerful mods like WorldEdit, the "Copy All 3D Coords" feature becomes incredibly valuable. You can often copy these coordinates directly into WorldEdit commands to instantly generate sections or even the entire dome with a few keystrokes. This is the ultimate time-saver for large-scale projects.
- Visual Plans for Complex Builds: Even if you're using WorldEdit, having a visual blueprint from a generator can still be immensely helpful. It allows you to plan your interior, check proportions, and visualize the structure before executing commands, preventing potential errors or unexpected outcomes.
- Adapting for Unique Shapes: While primarily designed for spheres and domes, the principles learned from these tools can be adapted. For instance, generating a full sphere and then removing the bottom half is an easy way to create a perfect Minecraft dome if the generator doesn't have a dedicated "dome" function.
The synergy between external planning software and in-game execution tools elevates your building potential exponentially.
Common Questions About Minecraft Dome Generators
"Are these tools difficult to use?"
No, most modern Minecraft dome generators are designed with user-friendliness in mind. With intuitive sliders and clear output options, even novice builders can quickly generate complex blueprints.
"Do I need to download anything?"
Typically, no. The most popular and effective generators are web-based, meaning you access them directly through your browser without needing any downloads or installations. This makes them accessible from any device with an internet connection.
"Can these generators create other shapes?"
While primarily focused on spheres and domes, some generators may offer variations like ovals, ellipsoids, or even partial spheres. Always check the specific tool's features. However, the core purpose remains generating perfect curves in a blocky environment.
"Are there any costs involved?"
The best and most widely used Minecraft Dome Generator Tools & Software are completely free to use. They are often community-driven projects or passion projects of developers within the Minecraft community.
"What if my diameter is an odd number?"
Generators handle both even and odd diameters seamlessly. The underlying math adjusts to ensure the most symmetrical shape possible. The key is that the generator will always produce accurate layer-by-layer plans, regardless of your input diameter.
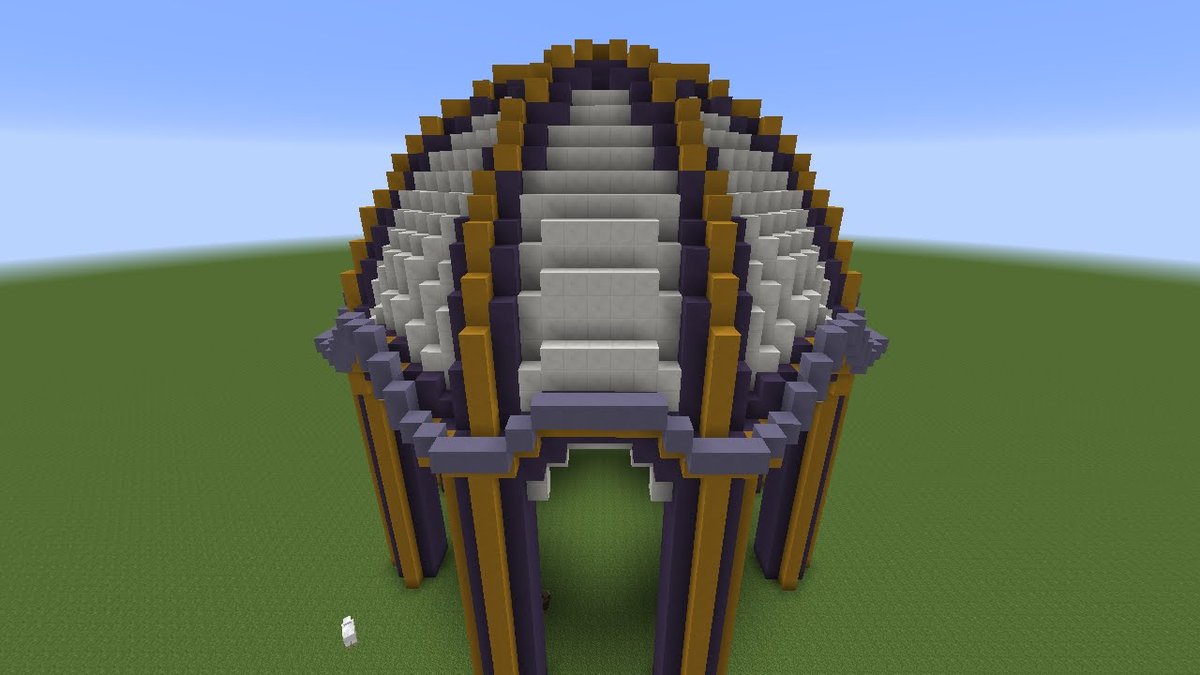
Building Your Next Masterpiece
Whether you're dreaming of a colossal glass biodome, a towering arcane observatory, or simply a perfectly curved ceiling for your base, Minecraft Dome Generator Tools & Software are your ultimate allies. They strip away the guesswork, alleviate the frustration, and empower you to focus on the truly creative aspects of your build.
By providing clear, layer-by-layer instructions and precise block placement guides, these tools bridge the gap between ambitious imagination and block-by-block reality. So, fire up your game, open your generator, and prepare to craft some truly spherical wonders. Your next magnificent Minecraft masterpiece is just a few clicks – and a lot of careful building – away.